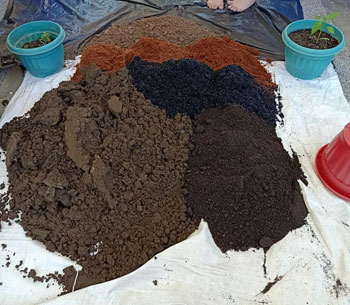
Soil sterilization – it can be a new idea to many people. But you will be benefitted knowing how to sterilize soil so that nothing will grow. Like we humans need food to stay alive, the soil must be suitable for the seeds or plants to grow. You should prepare soil while killing all the chances to grow pathogens, weeds, fungus, etc.
Sterilization methods are mostly used in making potting soils free of unnecessary things. Managed soil from stores or a new place, it can be the birthplace of these things:
- Gnats and nematodes are tiny insects. They enjoy living inside the soil and making it unfertile. They lay eggs in the soil and reproduce for longtime shelters. They can be found even if you buy soil from the nurseries or the stores.
- Unsterilized soil may be a way of planting weeds beside the plants you want. Weeds consume necessary soil nutrients and liquids.
- Soils from the stores may come with the mold and fungus too. The ventilation holes, including humidity and moisture of the soil bags, help to keep them functional.
- Pathogens (different bacteria and viruses) can destroy the fertility of the potting soil. They can restrict the normal growth of the plants. They can even be moved from one place to another.
Soil Sterilization and Its Benefits

You may have done it but did not know the term. Commercial greenhouses, agriculturalists sterilize the soil with a frequency as some do it once a year; some do when there is an attack of pests and diseases. Sterilization costs less than damaging or treating all the crops and plants.
Soil sterilization makes soil perfect in condition to germinate seeds, propagate stem and shoot cuttings, juvenile plant transplants. It also cures the soil with mold, fungal, and other infections. However, there has been a argument about whether you should sterilize soil or not. It is because sometimes you may repel the necessary and good bacteria and other microorganisms.
You can get these benefits from soil sterilization:
- Sterilization makes soil ideal for the proper growth and development of the plants.
- Eliminates the chances of growing fungi, gnats, nematodes, pathogens etc.
- Boosts the soil fertility that helps to grow high-quality crops or plants.
- It requires less time, cost, and manual labor to complete the project.
So, sterilization is indeed helpful to keep your garden lovely and lively.
How to Sterilize Soil
These are the methods of soil sterilization prohibiting the growth of unnecessary things:

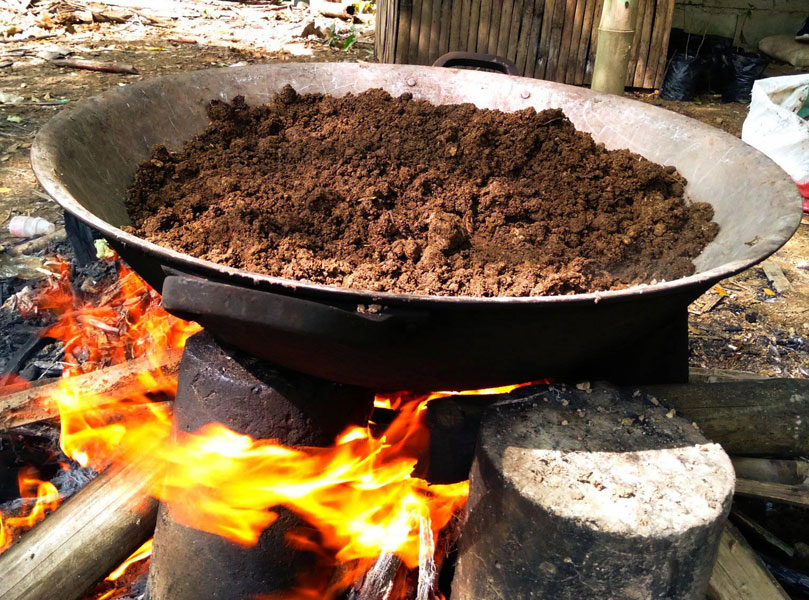
Sterilize Soil With Heat
Most of the gardeners or home garden owners use this method. It is so much effective than other soil treatments.
Heat treatment is basically heating the soil by raising its temperature. You can use steam, dry heat the soil directly to kill the harmful microorganisms, fungi, weed seeds, etc. You can heat the soil to the threshold.
When you maintain the threshold heating time, the internal soil temperature reaches a certain point. This increased temperature becomes unsuitable for the weeds and pests. However, most experts suggest heating the soil for a minimum of 30 minutes to prepare the soil for pots.
The excessive temperature of the soil may boost the phytotoxicity for different organic compounds.
Sterilize Soil With Solarization
If you need to sterilize a huge amount of soil, you can follow this method. Solarization can purify the whole garden or the field. The common way to conduct this method is you need to cover the field or garden with a couple of plastic layers. It increases the temperature of the covered soil due to the continuous absorption of the sun rays.
You can also trap the heat in different ways, like keeping pot soil inside the bottom and top plastic layers. If the amount of the soil mix is small, then you can use zip-lock plastic bags and keeping it under the sun.
You should choose transparent plastic over other colored plastics. If it is black, then some solar energy may be deflected. But transparent is better in this case. The thickness should be 1-2mm in different conditions. Thinner plastic can work best, but there’s a risk of winds or animals tearing it. These thicknesses are good for large areas. You can arrange thicker plastics for use in smaller spaces.
However, you must prep your mineral soil or potting soil before covering with plastics. Remove the litter and break all the clods up off the soil. For potting soil, spread soil over the plastic layer in such a way that the plastic edges are at least six inches away. Secure the covering with keeping rocks over the plastics at the edges.
The duration of solarization is also essential. It can be 4-6 weeks in the summer days. If the area is more aloof, wind flows mostly, or cloud is common, increase the duration to 8-10 weeks.
Sterilize Soil with Boiling Water or Steam
Steaming the soil is a faster way of sterilizing the soil. You may need at least 30 minutes to prepare the potting soil. Professionals suggest steaming or boil water at 180°F (82°C). You can use two different methods of steaming water: pressure cooker or non-pressure cooker.
If it is a pressure cooker method, then follow these steps:
- Bring a pressure cooker and fill it with 8-10 cups of water. Put the rack into the cooker. Now, you need to set containers (heatproof) on the rack that you’ve inserted. It should be placed above water with maximum 4” soil in each container.
- Then, take foil paper and cover each container securely. This will act like plastic like solarization.
- Then place the cooker lid slightly open so that steam can come out a little. If your pressure cooker allows heat adjustment, then set it in such a way to build steam. Maintain the pressure at 10-15 pounds to process the soil. Keep the steam valve closed for 15-30 minutes.
- Switch off the heater. Then, remove the lid after allowing pressure for subsiding. Now you can keep the sterilized soil with aluminum foil.
If you want non-pressure cooker method, follow these:
- You can use a non-pressure cooker to heat the soil. For this, add some water (2.5cm height from bottom) in the steam container. Make sure you put a rack below the container.
- Keep the maximum 4” soil in each container. You need to place the heatproof containers on the rack above the water. Then cover all the containers securely with the foil paper.
- Then place the cooker lid slightly open so that steam can come out a little. Leave the cooker alone for 25-30 minutes to boil the water.
- Switch off the heater. Remove the lid after allowing pressure for subsiding. Now you can keep the sterilized soil with aluminum foil.
Sterilize Soil in Oven
Oven sterilization can be a prolific idea if you want to sterilize small to medium batches of soils. Some experts give an opinion that this method is safer than boiling water or microwave. The only thing you need to keep in mind that there will be odor inside the kitchen after processing the soil. So, better will be if you maintain proper ventilation and windows open.
To sterilize soil through the oven, add almost 3” soil in an oven-proof container. Then, moisten the soil by adding some water into it. Avoid making it too soggy with water which may slow down the sterilization.
Then cover each container with aluminum foil securely. Keep the container in an oven. The heat setting should be 200°F. Keep your eyes on the oven display monitor. If the thermometer says temperature reached to 180°F, bake the soil for 30 minutes. Keep the oven door open.
After baking, turn off the device and cool the soil. Then store it to use when you need.
Sterilize Soil With Microwave
This method is good for soil for potting mix. You can purify a small amount of soil through the microwave method. But you should filter the soil from any metal particles in it. Otherwise, accidents may occur due to metals.
To start this method, you will need a clean, transparent zip-top plastic bag. Then, fill it with two pounds of moist soil that holds together in a clump. Like the oven method, do not make the soil too wet or runny.
Keep the zipper on top open. Then put the bag inside the microwave. Adjust the temperature in between 180°F-200°F. The duration of reaching this heat may depend on the quality of the microwave.
Turn off the microwave and bring the bag outside. Close the zipper and let it cool parallel to room temperature.
Sterilize Soil With Hydrogen Peroxide
This method may sound tough if you think it in a much technical way. But it is actually easier to perform. You can practice for better satisfaction.
You should arrange a bucket filled with water. Then mix Hydrogen Peroxide into it. You can choose the bucket size depending on how much soil you want to be sprayed. Then use a sprayer to spray the solution on the soil. You may find different sizes of garden sprayers at the market. However, cover your body and hands before spraying the solution.
Excessive uses or direct uses of Hydrogen Peroxide may cause harm to your skin. This aggressive and extremely concentrated chemical can destroy many materials. You can use 3% or 35% Hydrogen Peroxide for best outcome.
Conclusion:
Soil sterilization is the best way to create right conditions of soil to plant seeds and plants worry-free. Using the same soil or the soil from stores may contain harmful living beings. You can keep them away for a long time with sterilizations.
Above mentioned methods are the most popular ways to sterilize potting mix or garden soil. Choose any method according to the needs and regulations.
Happy Gardening!
